Start with the subject
Begin with “a person” so the prompt clearly describes the animated character.
Blender add-on · Local AI motion
Motion Flow turns simple text into editable character animation without leaving Blender. Write an action, guide important poses, and generate a complete motion sequence on a Core27 rig.
See it in action
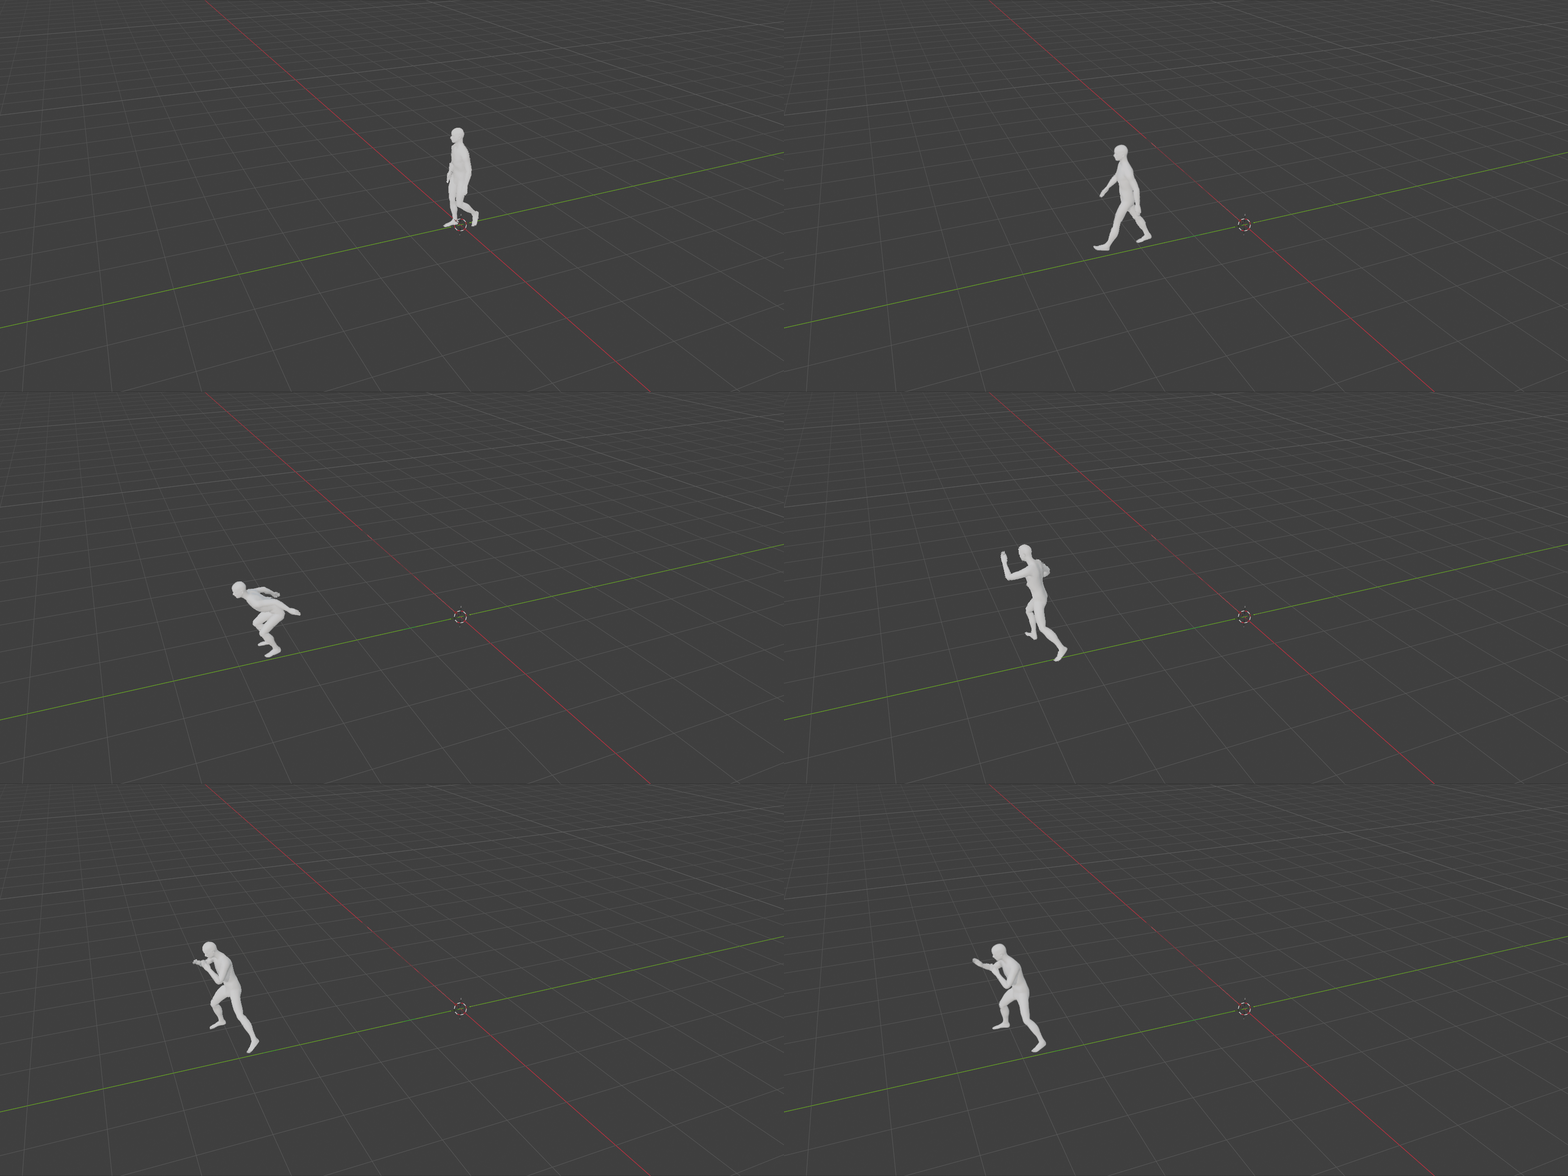
These are real Motion Flow results playing directly in Blender.
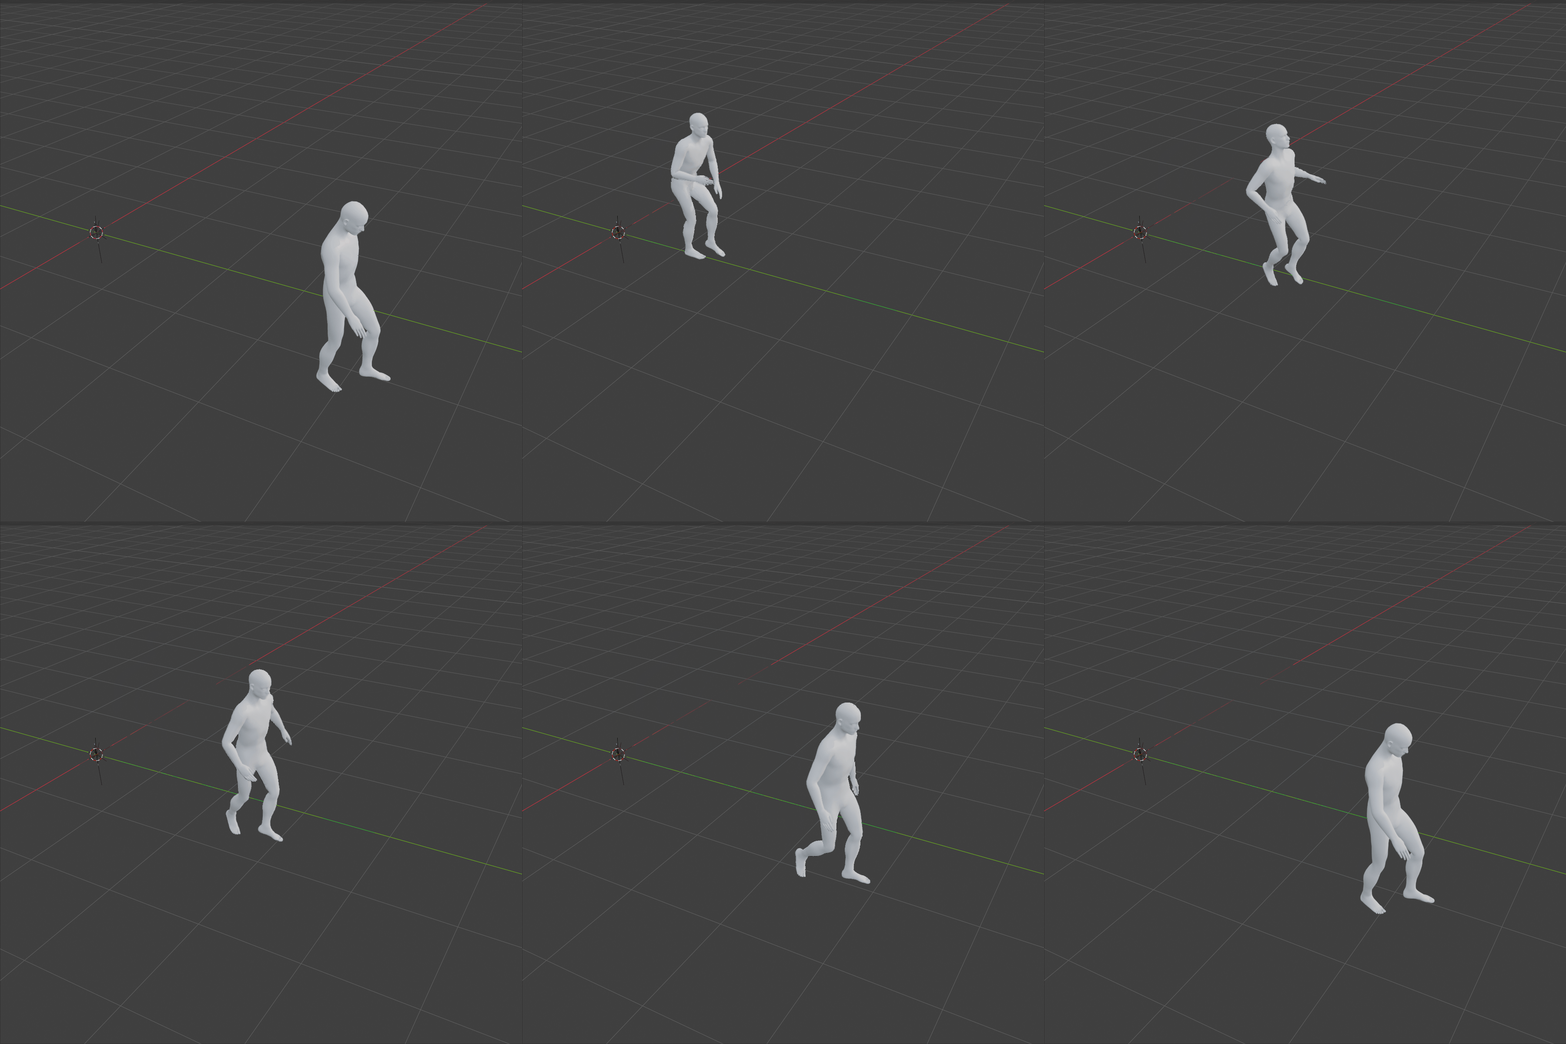
Person limps over obstacles with their injured leg while moving in a circular pattern.
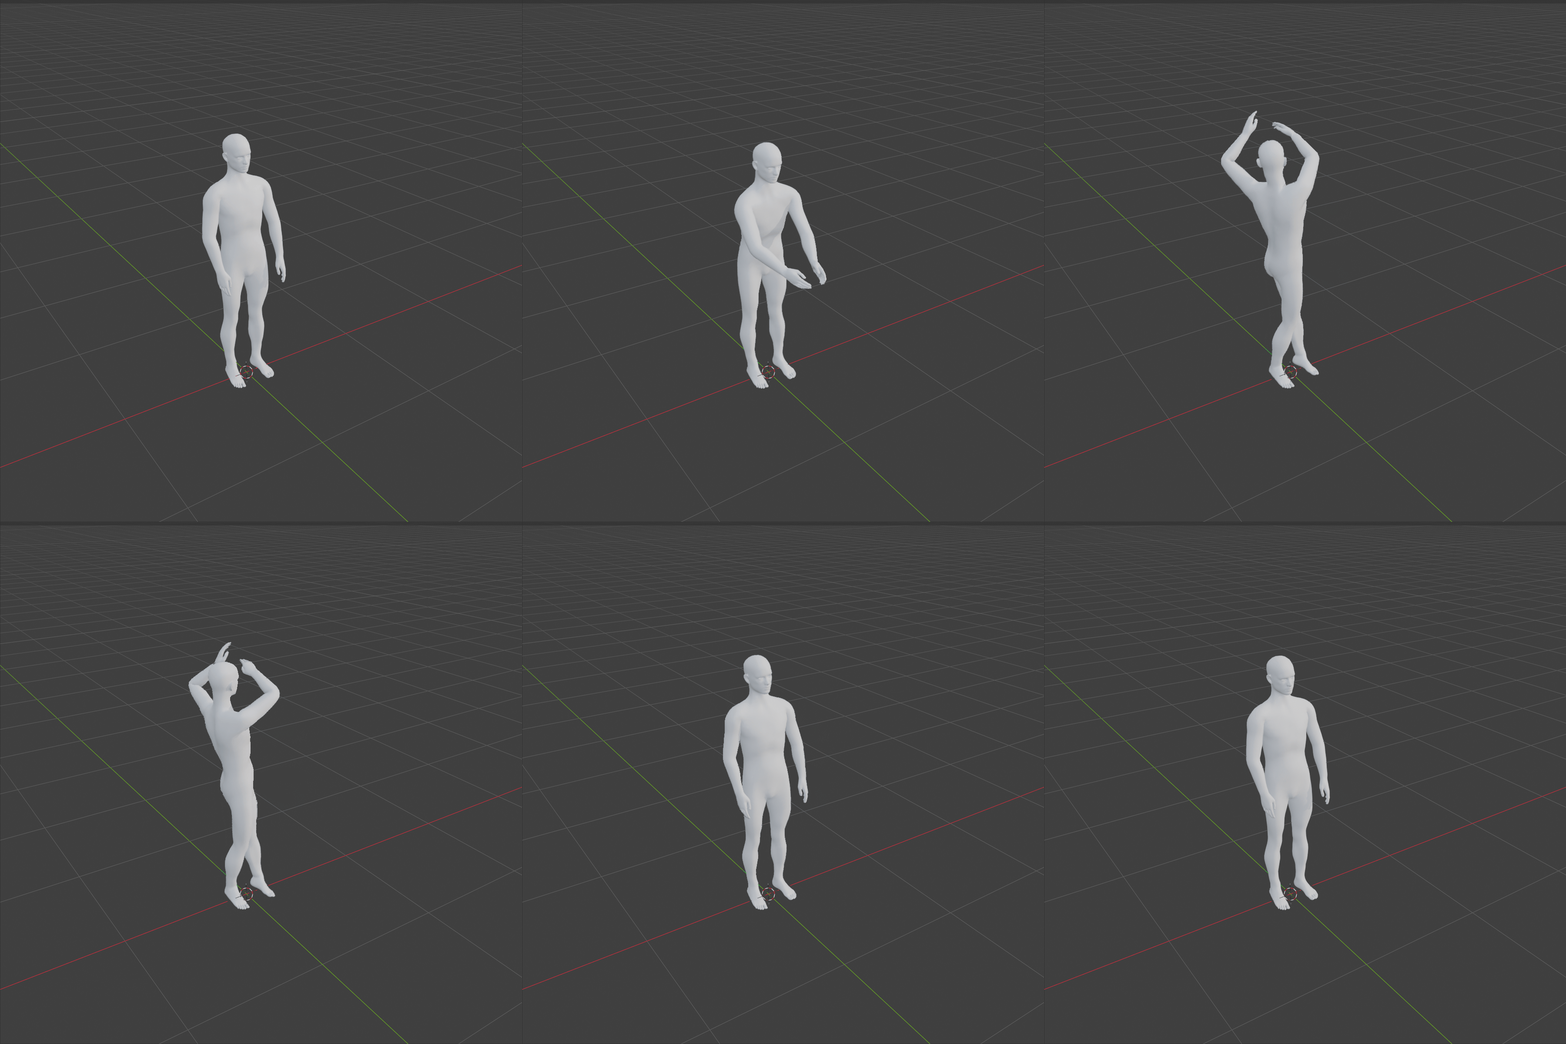
A person picks up a small object with both hands from a medium height in front and puts it away high up back.
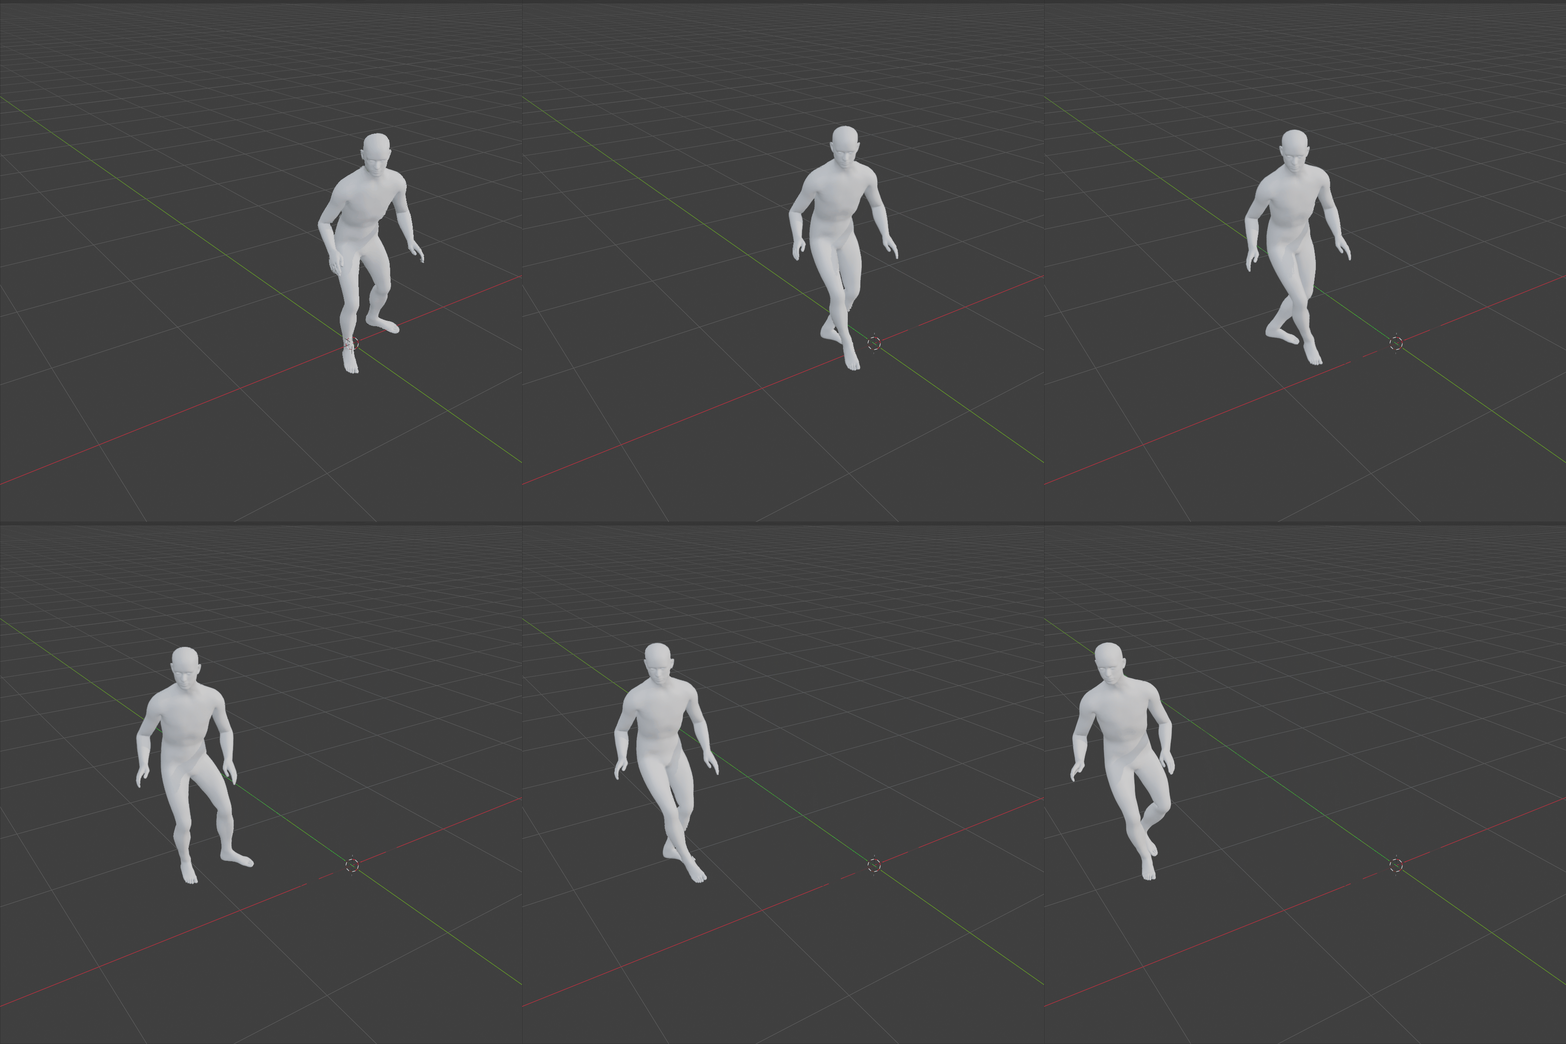
A person is stealthily walking sideways to their right at a slow pace, taking medium steps in a criss-cross fashion while taking multiple turns.
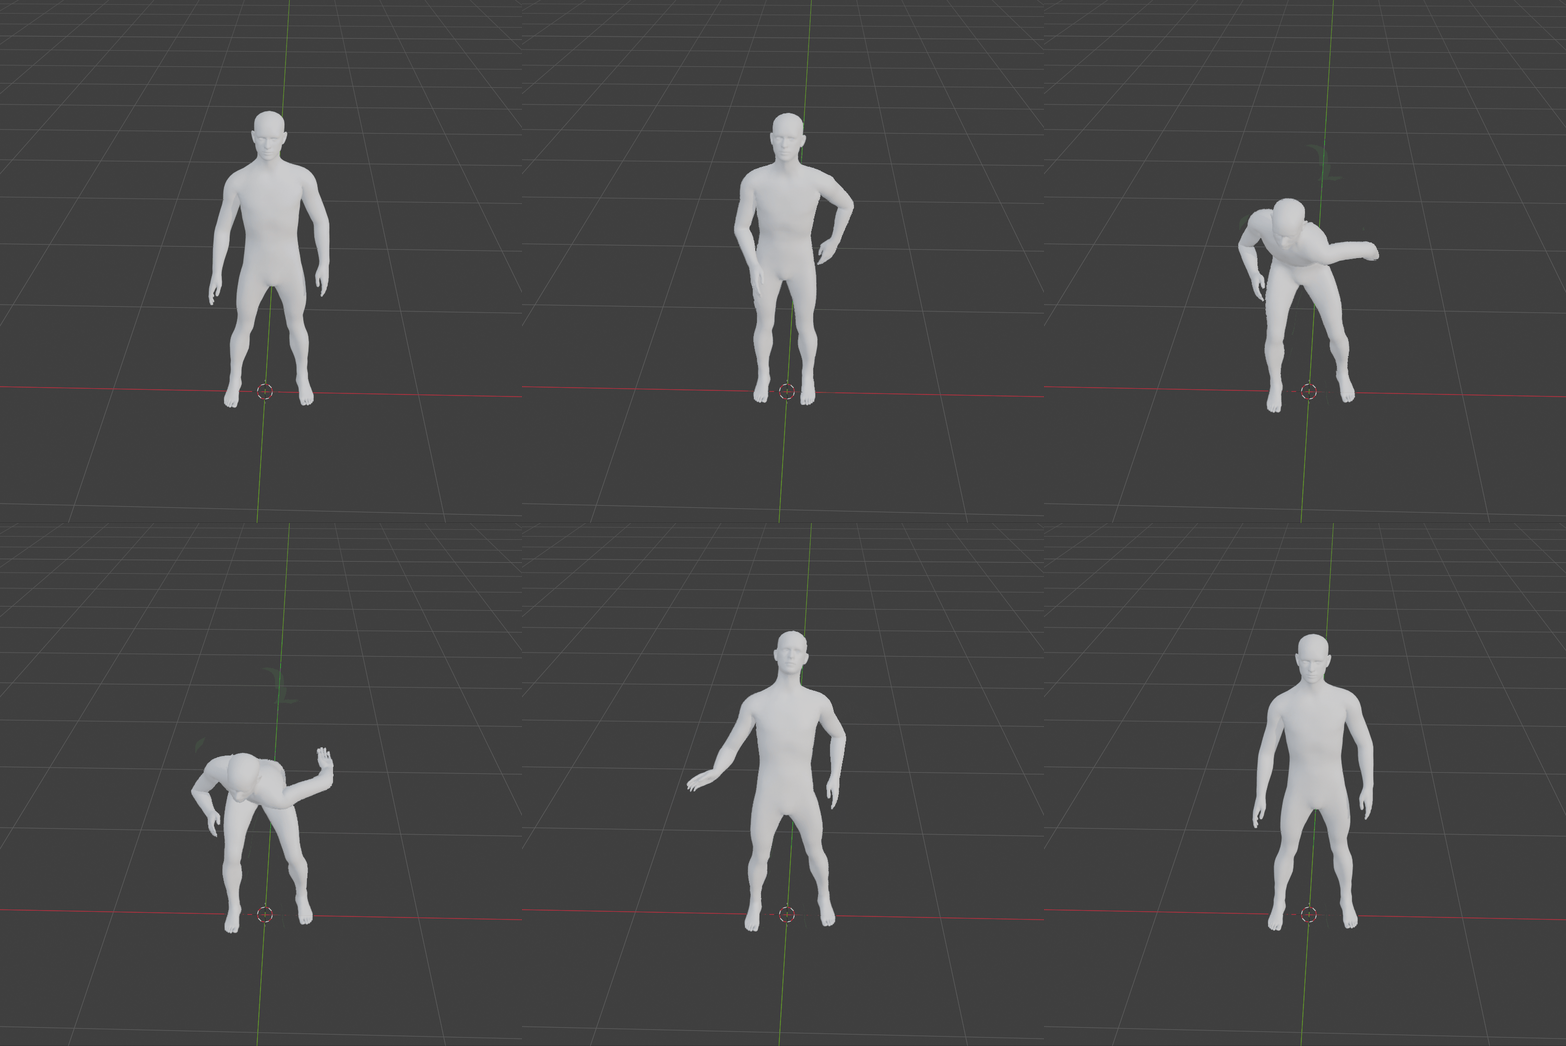
A person standing upright swiftly performs a worm-like victory dance by hunching forward and making loose, chaotic arm movements.
Prompt → Generate → Play animation
Square format · Recommended 1080 × 1080Prompting ARDY
ARDY (Autoregressive Diffusion with Hybrid Representation) generates human motion from text. Treat a prompt as a clear physical direction for a Core27 character: name the subject, the action, and where it moves.
Begin with “a person” so the prompt clearly describes the animated character.
Use direct, observable verbs such as walks, turns, reaches, jumps, or sits.
Add physical direction when it matters: forward, backward, to the right, or in a circle.
Keep the description grounded in a movement a person can physically perform.
| Desired animation | ARDY prompt |
|---|---|
| Basic movement | a person is walking |
| Directional shifting | a person side steps to the right |
| Complex action | a person is running, jumping, and sitting |
Prompt human actions such as walking, gesturing, turning, or crouching. Abstract or impossible requests can produce unreliable motion.
Say what the character should do. Instead of “without swinging arms,” describe the intended arm position or movement.
Translate mood into visible movement. For example, use “walks slowly with a slumped posture” instead of “walks sadly.”
Use Motion Flow’s prompt chain to break a longer performance into simple actions, then adjust each prompt and duration for a better transition.
Read the ARDY research paper for the underlying real-time motion-generation system. Motion Flow uses ARDY locally with its Core27 rig workflow.
Prompt chaining
Motion Flow joins prompt steps into one continuous animation, so you can describe a longer performance one action at a time.
Features
Start with words, guide the details that matter, and finish with normal Blender tools.
Describe an action in everyday language. Motion Flow creates natural full-body animation directly in your scene.
Join several actions into one sequence. Set the duration of each step and change their order at any time.
Guide a hand, foot, hip, body section, or full pose at a chosen frame. Control how strongly each target is followed.
Use animation from a selected frame range as guidance when generating a new result.
Keep Blender responsive while motion is generated. Clear status and progress messages show what is happening.
The model and managed server run on your computer. After setup, generation does not depend on a cloud service.
Installation
Keep motion_flow_addon.zip and models_bundles.zip compressed. Motion Flow handles the rest from Blender preferences.
Windows only (currently). Requires Blender 4.6 or newer, at least 16 GB of system RAM, and an NVIDIA RTX GPU with at least 8 GB of VRAM.
Open Blender and go to Edit → Preferences → Add-ons. Choose Install from Disk, select motion_flow_addon.zip, and enable the add-on.
Open the Motion Flow preferences. Under Server Environment Setup, choose Setup Local Server. Keep Blender open until setup is complete.
Under Local Models Installation, select models_bundles.zip and choose Install Models from ZIP.
The preferences should show Ready (Server & Models Installed). Press N in the 3D Viewport and open the Motion Flow tab.
Video guide
Use this area for a YouTube walkthrough covering installation, the first prompt, constraints, and generation.
Interface guide
Motion Flow is organized into five small panels in the Blender sidebar, plus one setup area in add-on preferences.
Generate and monitor your sequence.
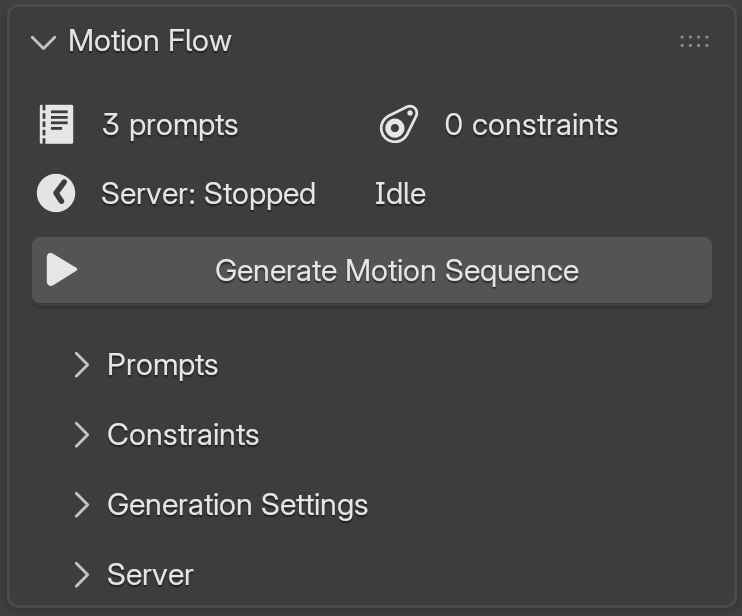
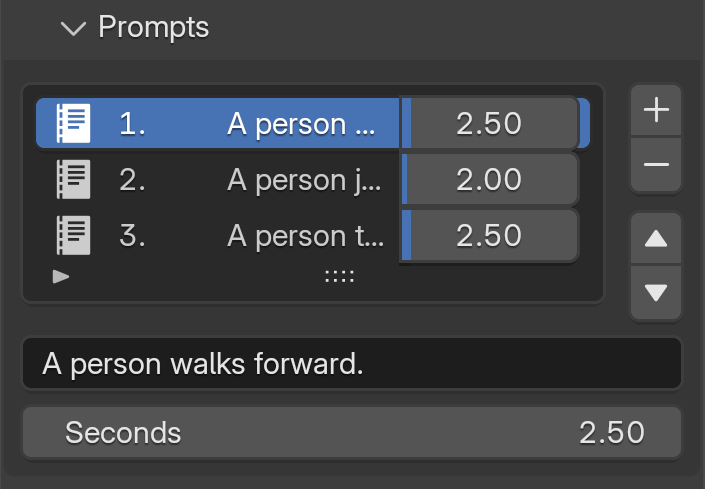
Build a longer motion, one step at a time.
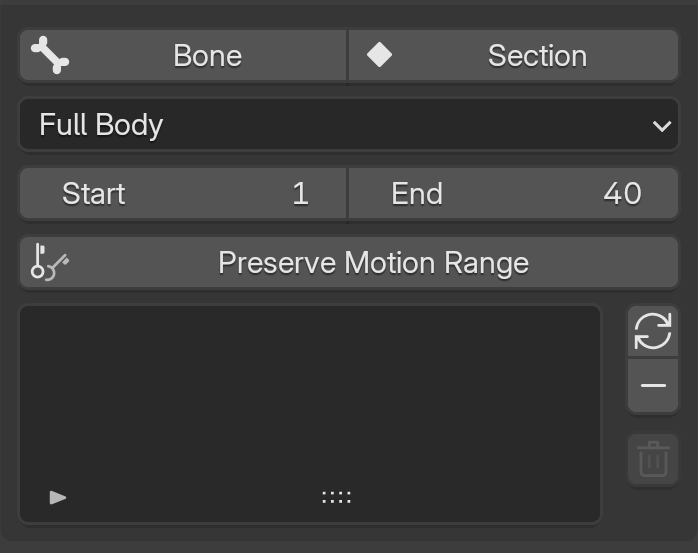
Guide key poses without losing control of the motion.
Balance direction, variation, and repeatability.
Manage local AI inference.
Set up the local server, models, and output behavior.
Main status and generation controls
Shows how many prompt steps will be generated.
Shows how many enabled pose targets are active.
Shows whether the local AI server is offline, starting, online, or busy.
Starts generation using the current prompts, constraints, and settings. Progress appears in the same panel.
Build the motion in clear steps
Adds a new motion prompt to the sequence.
Removes the selected prompt.
Moves the selected prompt earlier or later in the sequence.
Describe the physical action in simple language, such as “A person walks forward and waves.”
Sets how long the selected action should last.
Guide important poses and body parts
Captures the selected Pose Mode bone as a position and rotation target at the current frame.
Captures a full body, left hand, right hand, left foot, or right foot pose from the Core27 rig.
Chooses which body part is captured by Section or Preserve Existing Range.
Sets the frame range used when preserving existing animation.
Samples the current animation in the chosen range and uses it as guidance.
Updates the selected constraint from the character’s current pose.
Removes one selected target or clears every constraint.
Includes or ignores a constraint without deleting it.
Sets how strongly the selected target is followed, from 0 to 1.
Shows the target frame, position, and rotation. These values can be adjusted directly.
Balance creativity, control, and repeatability
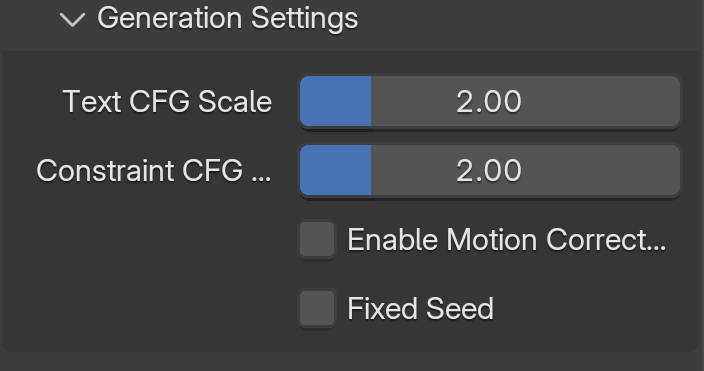
Controls how strongly the model follows the written prompt.
Controls the overall strength of all pose constraints.
Applies post-processing to improve motion and reduce common contact problems.
Makes repeated runs more consistent so you can compare small setting changes.
Chooses the number used for a repeatable result when Fixed Seed is enabled.
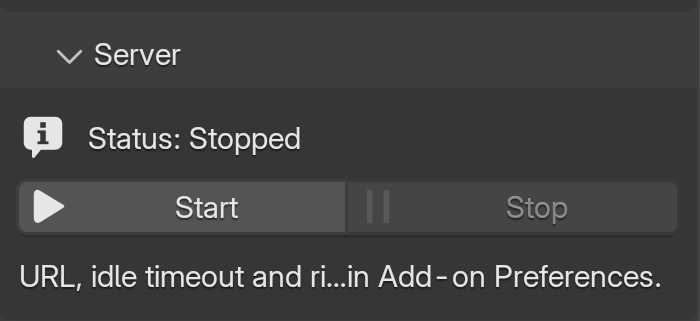
Manage local AI inference
Shows whether the local server is ready and provides a short status message.
Starts the local server manually. It also starts automatically when you generate.
Stops the server launched by the current Blender session when it is not busy.
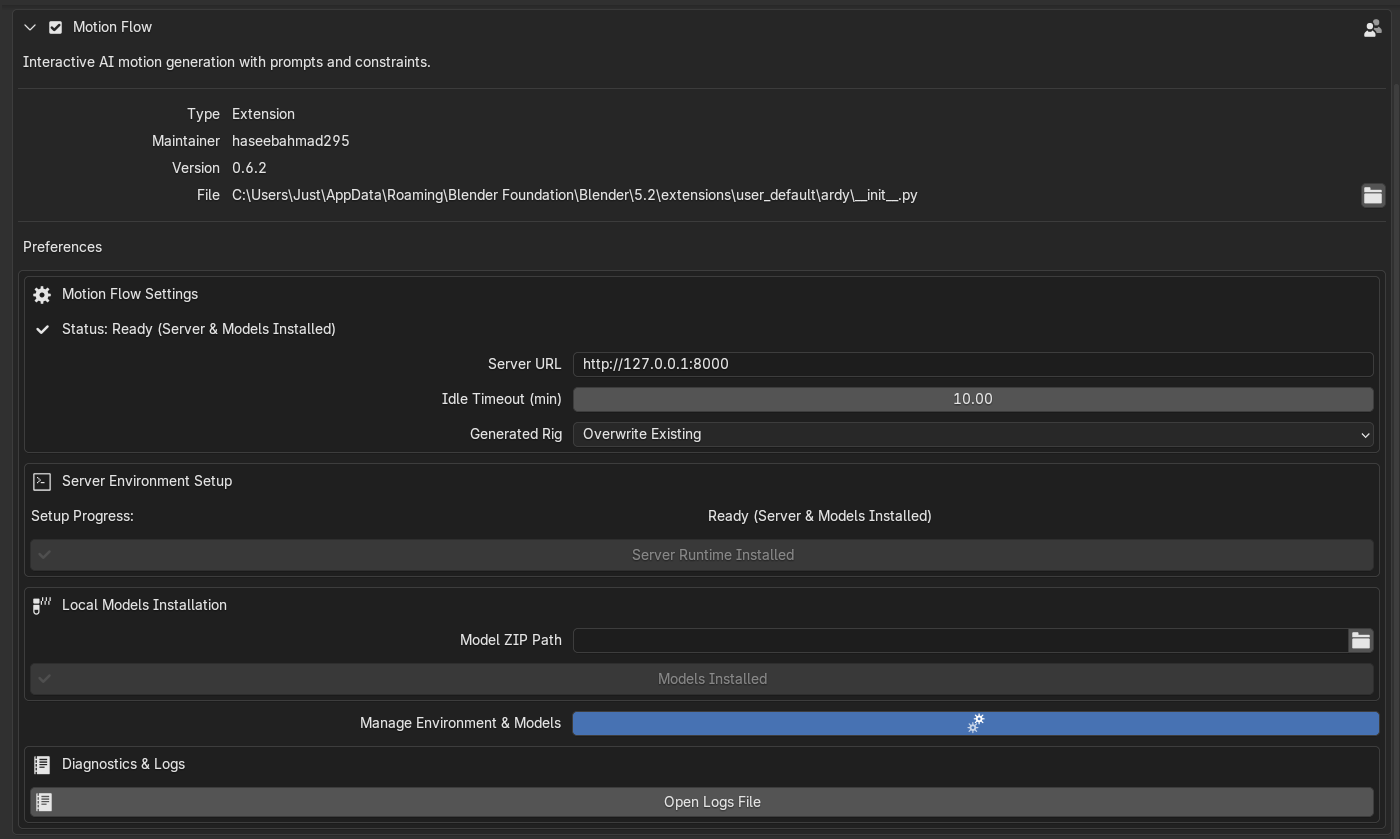
One-time setup and output behavior
Sets the local Motion Flow API address or an advanced external compatible server.
Stops the managed server after a chosen number of unused minutes. Set it to 0 to disable automatic shutdown.
Choose to overwrite animation on an existing Core27 rig or import a new rig for every result.
Installs the bundled Python runtime and required dependencies.
Selects the downloaded model bundle without unpacking it manually.
Extracts the required motion and text models into the add-on folder.
Opens the activity and error log for setup and troubleshooting.
04C — Retargeting
Motion Flow generates animation on a built-in Core27 armature—not SMPL-X. Use Auto-Rig Pro's Remap tool to transfer that motion to a custom character.
Install the Auto-Rig Pro add-on in Blender. Its Remap feature is included with the add-on; see the official ARP Remap documentation for full details.
Create your motion in Motion Flow, then select Generate Motion Sequence. The generated Core27 character and its baked keyframes are the Source armature.
Keep your custom rigged character—the Target armature—in the same scene. Auto-Rig Pro, Rigify, and custom rigs are all supported. Before mapping, zero the target armature object's Location and Rotation with Alt+G and Alt+R.
In the 3D Viewport, open Sidebar (N) → ARP → Remap. Assign the Motion Flow Core27 armature as Source and your character as Target. Use Auto-Scale to match their scale, or scale manually with S.
Select Build Bones List. For compatible rigs, load a built-in preset such as Mixamo or Rokoko; otherwise map matching bones manually (for example, hips to hips and spine to spine). Mark the root bone—usually hips or pelvis—with Set as Root.
Both armatures must face the same direction in Edit Mode. If they differ, select Redefine Rest Pose on the Core27 source, tick Preserve, align mismatched limbs with Copy Selected Bones Rotation, then select Apply.
Choose Re-Target to transfer the animation. Use Interactive Tweaks for proportion differences, such as an additive pelvis location adjustment. When the mapping works, export it as a preset so later Core27 animations can be retargeted immediately.
The idea is simple
License
Motion Flow is sold through Blender Market. Your use is covered by the license selected for this product at checkout. Motion Flow uses NVIDIA's ARDY model, which is provided under the ARDY Apache 2.0 license. Please review both licenses before using the add-on in a commercial project.
Credits